Transforming an old, worn-out piece of bedroom furniture with a fresh coat of paint can breathe new life into your space. Whether it’s a beloved dresser that has seen better days or a nightstand that no longer fits your aesthetic, repainting is an affordable and satisfying way to customize your decor. This guide will walk you through the process, ensuring you achieve a professional finish—even if you’re a beginner. Repainting furniture isn’t just about aesthetics; it’s also about preservation. A well-executed paint job can protect surfaces from moisture, scratches, and wear, extending the lifespan of your cherished furniture. With the right techniques and materials, you can turn outdated pieces into stunning focal points that perfectly complement your style. Repaint Bedroom Furniture.
Choosing the Right Furniture for Repainting

Before you start, it’s important to select the right piece of furniture. While nearly any surface can be repainted, some materials require extra preparation. Solid wood is the best candidate since it absorbs paint well and allows for sanding. Veneer and laminate furniture can also be repainted, but they require careful priming to ensure adhesion. Consider the structure of the furniture as well. If the piece is wobbly, has peeling veneer, or is heavily damaged, you may need to make repairs before painting. Check drawers, hinges, and handles to determine whether replacements or reinforcements are necessary.
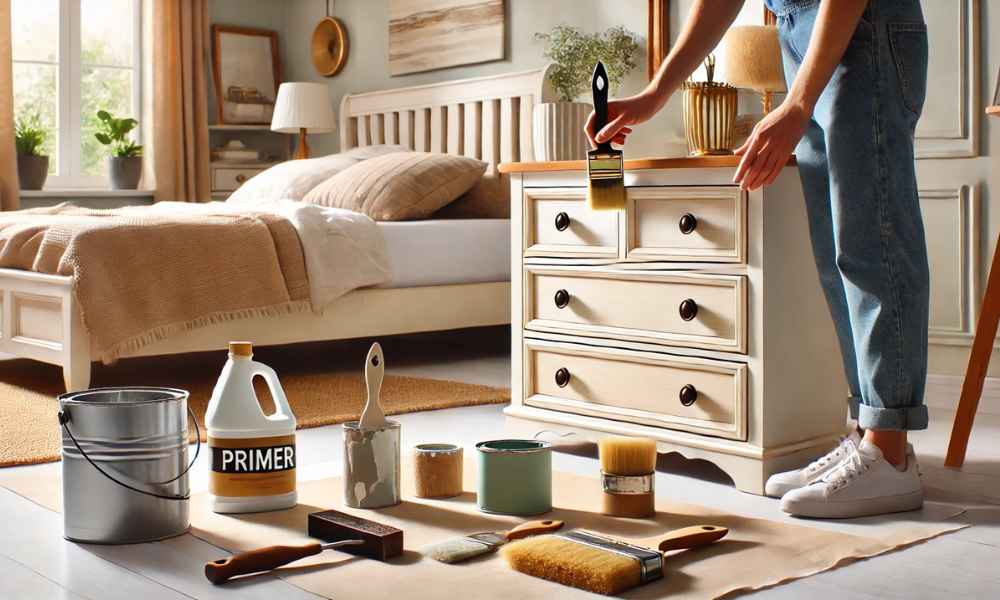
Gathering Your Supplies: Everything You Need Before You Start
Preparation is key to a smooth painting process. Here’s a checklist of essential materials:
- Sandpaper or an electric sander (for smoothing surfaces)
- Screwdriver (to remove hardware)
- Primer (to ensure paint adhesion)
- Paint (chalk, latex, or oil-based, depending on the desired finish)
- Paintbrushes and rollers (for different surface textures)
- Painter’s tape (to protect edges)
- Drop cloths (to keep your workspace clean)
- Tack cloth or microfiber cloth (for dust removal)
- Sealer or topcoat (for durability)
Gathering all supplies beforehand prevents interruptions, making the process more efficient and enjoyable.
Prepping Your Furniture for a Smooth and Durable Finish
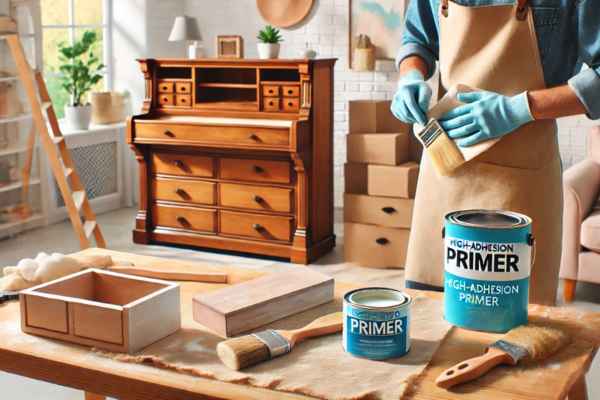
A well-prepared surface ensures a flawless final result. Start by thoroughly cleaning the furniture with mild soap and water to remove dirt, oil, and grime. Let it dry completely before proceeding. Next, lightly sand the entire surface using medium-grit sandpaper (120-150 grit) to scuff the existing finish. This helps the primer and paint adhere better. If your furniture has a glossy or laminated surface, use a deglosser or a high-adhesion primer to prevent peeling. If there are any cracks, dents, or gouges, fill them with wood filler and sand smooth once dry. Remove all dust with a tack cloth to prevent imperfections in your paint job.
Priming Your Bedroom Furniture: The Key to a Lasting Paint Job
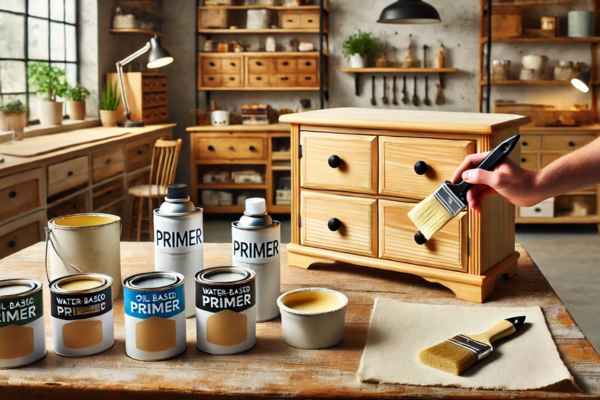
Skipping primer can lead to uneven coverage and poor durability, especially on dark or glossy surfaces. A good primer creates a solid base for the paint, enhancing adhesion and reducing the number of coats needed.
Choose a primer based on the type of furniture:
- Oil-based primer for furniture with stains or strong wood tannins
- Water-based primer for most wood and laminate surfaces
- Shellac-based primer for high-gloss or heavily stained furniture
Apply primer using a brush or roller in even strokes. Allow it to dry completely before lightly sanding with fine-grit sandpaper (220 grit) to smooth any brush marks or drips.
Selecting the Perfect Paint Color for Your Bedroom Furniture

Choosing the right color can make all the difference in achieving the desired aesthetic. Consider these factors when selecting a paint color:
- Room ambiance: Lighter shades create a sense of openness, while darker hues add coziness and sophistication.
- Current decor: Ensure the color complements your bedding, walls, and other furniture.
- Timeless vs. trendy: Classic neutrals like white, gray, and navy blue are versatile, while bold colors like emerald green and mustard yellow can make a striking statement.
For a modern, smooth finish, consider semi-gloss or satin paint, which offers durability and easy cleaning. If you prefer a vintage, distressed look, chalk paint is an excellent option.
Techniques for Painting Like a Pro

The way you apply paint can make or break your project. One of the most common mistakes beginners make is using the wrong tools or applying paint too thickly. Instead, opt for high-quality synthetic brushes for detailed areas and a foam roller for large, flat surfaces. This combination minimizes streaks and brush marks, creating an even, polished appearance.
When painting, always work in the direction of the wood grain for a natural, seamless finish. If using spray paint, keep the can at a consistent distance and apply in sweeping motions to avoid drips. For a distressed or antique look, experiment with dry brushing or layering multiple colors for depth. No matter the technique, always apply thin coats—rushing the process will only lead to an uneven or sticky finish.
Layering and Building Up the Perfect Paint Coat
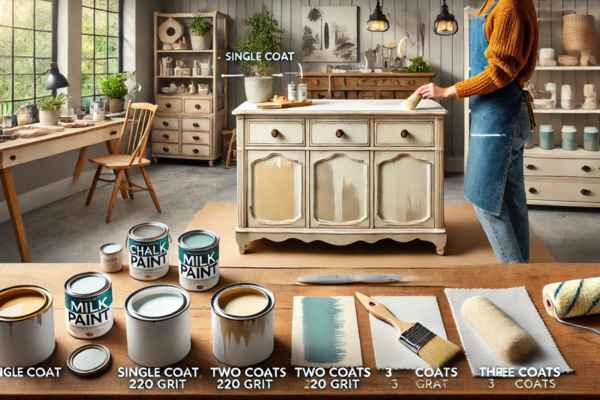
Achieving the perfect paint coat is all about patience and precision. Instead of applying one thick coat, which can lead to visible brush strokes, streaks, or a tacky finish, it’s best to use multiple thin layers. The first coat may look uneven, but don’t panic—subsequent layers will build opacity and smooth out imperfections.
Start with a high-quality primer to create a solid foundation for the paint. Allow it to dry completely before applying the first coat of paint. Between coats, lightly sand the surface with fine-grit sandpaper (220-grit) to eliminate texture inconsistencies. Wipe away dust with a tack cloth before applying the next coat. Most furniture pieces require at least two to three coats of paint for full coverage. However, darker colors may need an additional layer to achieve richness and vibrancy. If you’re using chalk or milk paint for a rustic look, consider adding a layer of wax between coats to create a soft, aged appearance.
Adding a Protective Finish: Sealing Your Masterpiece
Once your furniture is painted to perfection, sealing it properly will ensure its beauty lasts for years. Without a protective topcoat, your freshly painted surface may be vulnerable to scratches, stains, and everyday wear and tear. For a modern, smooth finish, opt for a polycrylic or polyurethane sealer in satin, matte, or glossy finishes. Polycrylic is water-based and works well for most painted surfaces, while polyurethane (available in oil- and water-based versions) provides a tougher, more durable finish. If you’ve used chalk paint, a furniture wax will enhance its velvety texture while providing protection.
Apply the sealer with a clean brush or lint-free cloth, ensuring even coverage. Allow each layer to dry completely before adding additional coats. Keep in mind that oil-based sealers tend to yellow over time, so they’re best used for darker-colored furniture.
Creative Painting Ideas for a Unique Look
Settle for a standard solid color when you can turn your furniture into a statement piece? If you’re feeling adventurous, explore different painting techniques to add character and personality to your furniture.
- Ombre effect: Blend two or more colors seamlessly for a gradient look.
- Two-tone painting: Paint the body of the furniture one color and the drawers or legs another for contrast.
- Distressed finish: Use sandpaper to lightly remove paint along edges and corners for a vintage look.
- Stenciling or decals: Add intricate patterns, florals, or geometric designs to enhance visual appeal.
- Metallic or pearl finishes: Incorporate gold, silver, or pearlescent paint for a luxurious, high-end appearance.
These creative approaches ensure your furniture stands out as a work of art rather than just a basic painted piece.
Common Painting Mistakes and How to Avoid Them
Even experienced DIYers make mistakes when repainting furniture. Being aware of common pitfalls will help you achieve a professional-looking result.
- Skipping prep work: Not cleaning, sanding, or priming properly can lead to peeling and uneven paint coverage.
- Applying thick coats: Rushing through the process with thick paint layers results in drips, bubbles, and longer drying times.
- Not allowing proper drying time: Each coat, including primer and topcoat, needs sufficient drying time to prevent tackiness.
- Using the wrong paint or tools: Some paints are not suitable for furniture, and low-quality brushes may leave bristle marks or streaks.
- Skipping the protective seal: Painted furniture is prone to chipping and scratching if not properly sealed.
By avoiding these common errors and taking the time to follow each step meticulously, you can ensure a flawless, long-lasting finish.
Caring for Your Newly Painted Bedroom Furniture
After investing time and effort into repainting your furniture, proper care is essential to maintain its beauty and durability. The curing process—where paint fully hardens—can take anywhere from a few days to several weeks, depending on the type of paint used. During this time, it’s crucial to handle the furniture with care to avoid dents, smudges, or peeling. To clean painted furniture, avoid harsh chemicals or abrasive scrubbers, which can damage the finish. Instead, use a soft cloth and mild soap diluted in water to wipe down surfaces. For high-traffic areas like dresser tops and nightstands, consider adding felt pads under decorative objects to prevent scratches.
Temperature and humidity can also impact the longevity of painted furniture. Excess moisture can cause paint to crack or warp over time, so keeping your furniture in a well-ventilated room with stable conditions is key. If you notice any chips or scratches, touch them up with leftover paint and a fine brush to maintain a flawless look. With proper care, your repainted furniture will remain vibrant and stylish for years to come.
Eco-Friendly and Non-Toxic Painting Options
As more people seek sustainable and health-conscious alternatives, eco-friendly paints have become an excellent choice for furniture restoration. Traditional paints often contain volatile organic compounds (VOCs), which release harmful fumes into the air. These can cause indoor air pollution and respiratory irritation, especially in enclosed spaces like bedrooms.
Fortunately, there are many non-toxic, low-VOC, and even zero-VOC paints available. Milk paint and chalk paint are popular choices for environmentally conscious DIYers, as they are made from natural ingredients and emit little to no odor. Water-based paints are also a safer alternative to oil-based ones, offering a durable finish without the toxic fumes. Another sustainable approach is to repurpose old furniture instead of discarding it. By refinishing instead of replacing, you reduce waste and contribute to a more circular economy. Choosing eco-friendly sealers and primers ensures your entire project remains safe for both your home and the planet.
Conclusion
Repainting bedroom furniture is a rewarding DIY project that allows you to personalize your space while breathing new life into old pieces. With the right techniques, thoughtful paint choices, and proper maintenance, your furniture can look fresh and stylish for years to come. Beyond aesthetics, opting for eco-friendly painting solutions benefits both your health and the environment. A well-cared-for painted piece not only enhances your bedroom but also reflects your creativity and commitment to sustainability. Whether you’re upcycling a thrift-store find or giving a family heirloom a modern twist, repainting is an excellent way to blend functionality with artistic expression.