
When It comes to home improvement projects or renovations, Selecting the perfect paint color can be A daunting task. With an endless variety of shades and hues available, it’s crucial to get A paint sample that accurately represents your desired color before committing to painting an entire room or space. Fortunately, obtaining A paint sample from your wall is A simple and effective way to ensure you make the right choice. In this article, We will provide you with step-by-step instructions on how to get A paint sample from your wall, Using easy techniques that won’t damage the surface or leave behind unsightly marks. Whether you’re aiming for A subtle change or A bold transformation, Mastering this process will empower you to confidently select the ideal paint color for any project.
Step-by-Step Guide: How to Extract a Paint Sample from Your Wall:
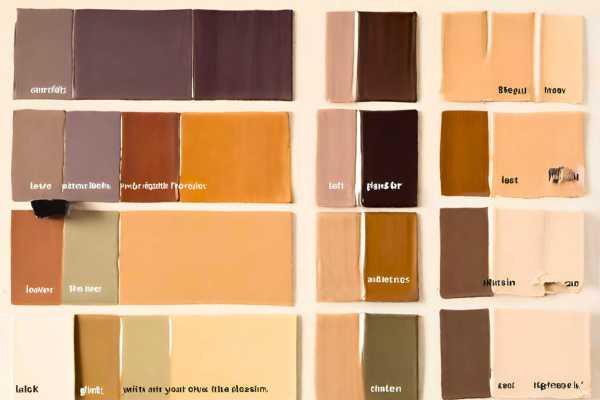
Why Take A Paint Sample?
When It comes to home renovation, Matching A wall’s existing paint color can be A daunting task. That’s where taking A paint sample from your wall comes in handy. This method provides an accurate representation of the exact hue And allows paint professionals to create A precise color match. It’s particularly useful when you’re touching up A small area or want to extend the same color to other parts of your home. By taking A paint sample, you can save time and money, Avoiding the hassle of repainting an entire room because the color wasn’t quite right. Ultimately, Taking A paint sample helps ensure consistency And harmony in your home’s color scheme.
How Big Should The Paint Sample Be?
The size of the paint sample you take from your wall can significantly impact the accuracy of the color match. Most dye professionals recommend A sample that’s at least the size of A quarter. However, if possible, A larger sample, such as A one-inch square, is even better. This size allows for a more precise analysis of the paint, Taking into account any slight color variations And ensuring A more accurate match. Remember, when removing the sample, choose an inconspicuous area of thepaint paint stripes on a wall to avoid noticeable damage.
How Long Does It Take To Match A Paint Color?
The size of the paint sample you take from your wall can significantly impact the accuracy of the color match. Most paint professionals recommend A sample that’s at least the size of A quarter. However, if possible, A larger sample, such as A one-inch square, is even better. This size allows for a more precise analysis of the paint, Taking into account any slight color variations And ensuring A more accurate match. Remember, when removing the sample, choose an inconspicuous area of the wall to avoid noticeable damage.
Identifying Old Paint Shades
Identifying old paint shades on your wall is crucial when you’re looking to maintain or extend the existing color scheme in your home. Start by examining the wall in different light conditions, as lighting can significantly affect the perception of color. Take note of the sheen – is it flat, eggshell, semi-gloss, or gloss? This will affect the match. If the paint was applied years ago, it could have faded or discolored over time. Using a dye chip or sample from the wall, you can approach a paint store for identification. They can use color-matching technology to identify the exact hue, offering a solution to maintaining the aesthetic continuity of your interiors.
Matching With New Paint
Matching an old stain shade with a new stain is A delicate process but achievable with modern technology. Once you’ve identified the old dye shade, you can take A model to a tint store. They will use spectrophotometers, devices that analyze the stain on A microscopic level, To determine the exact stain formulation. After the initial analysis, the new dye is mixed And should provide A near-perfect match to your piece. It’s recommended to test the new dye in A small, inconspicuous area of your wall to ensure the match is accurate under your home’s specific lighting conditions.
Preparation Before Getting A Paint Sample
Before you take A paint sample from your wall, There are A few preparation steps to follow. Choose an inconspicuous area of your wall to take the sample, such as behind A piece of furniture. Clean the area with A damp cloth to remove any dirt or grime that could affect the color accuracy. Let it dry completely. Next, Use A utility knife to carefully cut through the dye, making sure to capture all layers if there are multiple. Aim for a sample that’s at least a one-inch square for the best color match. Finally, place the model in a clean, sealed bag to prevent any damage or contamination before taking it to the dye store.
The Step-By-Step Guide To Extracting A Paint Sample
1. Locating The Sample Area

Identifying the right spot to take A paint sample from your wall is the first step in achieving an accurate color match. The area should be clean, free from damage, And representative of the overall color. Try to avoid areas near windows or corners, as the color may have faded due to sunlight exposure or could be slightly different due to shadowing. Instead, select a spot that’s typically hidden, such as behind a large piece of furniture or a painting. This ensures that you’re sampling the most consistent color on your wall, and any damage from taking the sample will be less visible.
2. Removing The Sample
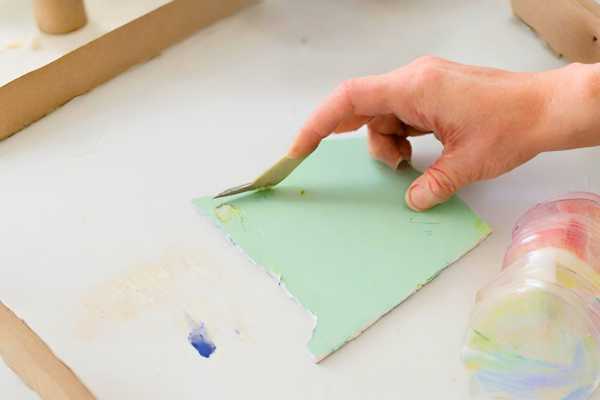
Once you’ve identified your piece area, the next step is to carefully remove the painted piece. Using a utility knife, score A small square or circle into the wall. Aim to make the model at least one inch by one inch to ensure an accurate stain reading. Be sure to cut through all the layers of stain down to the surface. Once you’ve scored the area, carefully peel away the stain piece with your knife’s edge. Remember to proceed with caution to avoid causing unnecessary damage to your wall or the model.
3. Preserving The Sample
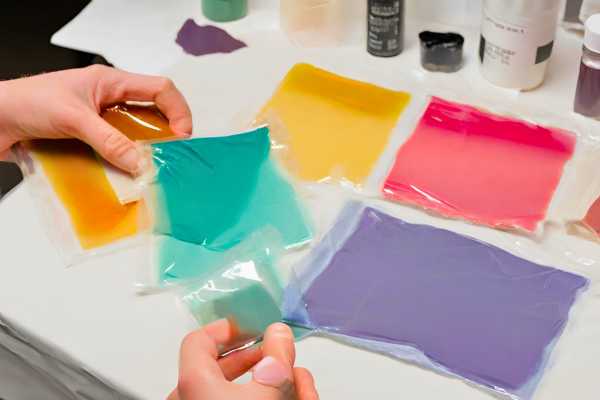
Properly preserving your color sample is crucial to maintaining Its integrity for an accurate colors match. Once the model is removed, place It in A plastic bag or wrap It in plastic wrap to protect it from dust, dirt, or any other contamination. Keep the model flat to avoid crumpling or breaking, which could affect the stain reading. If you can’t immediately take the model to the stain store for matching, store it in a cool, dry place away from direct sunlight. This careful preservation will help ensure A precise stain match, enabling you to maintain the original look of your walls or seamlessly extend the stain to other areas.
4. After Extraction: Analyzing Your Paint Sample
Identifying the right spot to take a paint sample from your wall is the first step in achieving an accurate color match. The area should be clean, free from damage, and representative of the overall color. Try to avoid areas near windows or corners, as the color may have faded due to sunlight exposure or could be slightly different due to shadowing. Instead, select a spot that’s typically hidden, such as behind a large piece of furniture or a painting. This ensures that you’re sampling the most consistent colors on your wall, and any damage from taking the sample will be less visible.
5. Taking Your Sample To The Paint Store
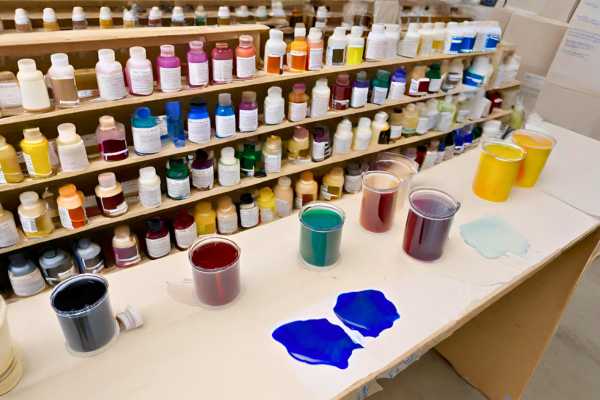
With your stained piece securely preserved, it’s time to take It to the color store. The professionals there will use specialized equipment like A spectrophotometer to analyze the model and create an accurate stain formula. It’s important to share all the information you’ve gathered during your analysis, such as lighting effects, the sheen level, and the age of the dye. All these factors can influence the match. Once they’ve created the formula, the stain store will usually provide a small model for you to take home and test on your wall to confirm the match.
6. Choosing The Right Paint
Once your stain match is confirmed, the next step is choosing the right type. Consider the sheen level of your original stain. Flat, eggshell, semi-gloss, or gloss finishes each have their unique characteristics and best-use scenarios. If your wall is in a high-traffic area or a room prone to moisture, like a kitchen or bathroom, choose a more durable and washable finish like semi-gloss or gloss. If you’re painting a living room or bedroom, a flat or eggshell finish might be more appropriate for a cozy and less reflective ambiance. Remember, the goal is not just to match the, but also to match or improve upon the functionality of your original stain.
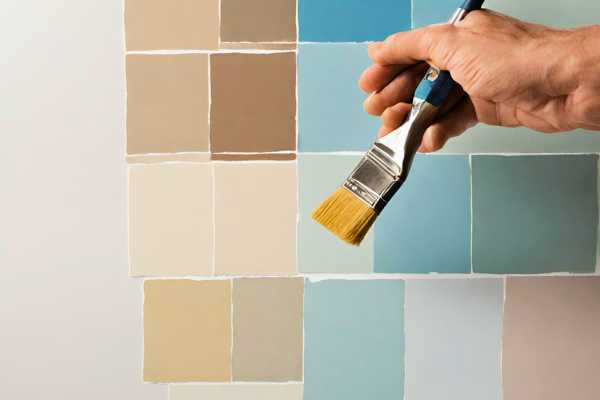
7. Repainting The Sampled Area
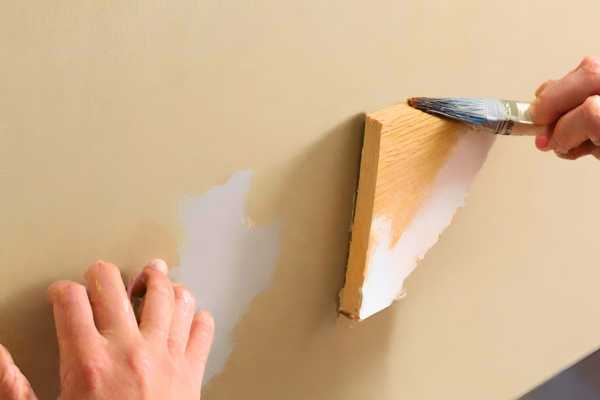
Once you’ve obtained the matched stain, it’s time to repaint the sampled area on your wall. First, prepare the area by gently sanding the edges of the extracted model spot to smooth any rough edges. Wipe away the dust with a damp cloth and let the area dry. Then, apply a primer if the wall surface is bare. Once the primer is dry, apply the matched color using a small brush. Start with the edges and then fill in the center for an even application. Apply multiple thin coats until the patch blends seamlessly with the rest of the wall. This careful repainting ensures the sampled area is indistinguishable from the rest of the wall.
Application Process
The application process of your matched color will depend on the size of the area you’re painting. If you’re touching up small areas, A small paintbrush is perfect for the job. However, if you’re painting A larger surface, you’ll need A roller for efficient coverage. Always start with a primer to ensure good adhesion and to allow the paint’s true color to shine. Apply the color in thin, even layers, allowing each layer to dry before applying the next. This method will help you achieve a smooth, streak-free finish that matches the rest of your wall.
Can I Match The Color Of My Paint Sample Online?
Yes, some companies offer online color-matching services. You would need to scan or take a high-quality photo of your color piece and upload it to their website. Their software will then analyze the colors and provide a close match from their color selection. However, while this method can be convenient, it may not be as accurate as taking your physical model to a store. The stain rendering on screens can vary significantly depending on the device’s settings and lighting conditions, potentially leading to color discrepancies. Therefore, for the most accurate match, it’s recommended to use a physical piece.
What If I Can’t Remove A Paint Sample From The Wall?
In some situations, it may not be feasible or desirable to physically remove a painted model from your wall. Perhaps the paint is too thin, or the wall material is sensitive. In such cases, consider using a stain-matching tool or app. Many dye brands offer such tools that can accurately read the color directly off the wall and provide a corresponding dye colors from their product line. Alternatively, you could try to match the stain yourself using a printed stain swatch book. While these methods may not be as precise as a physical sample. They can still provide a close match that meets your needs.
Conclusion
Getting A paint sample from A wall is A crucial step in home renovation And redecoration projects. While it might seem A bit daunting, the process is straightforward with the right preparation and tools. From identifying the right sample place to retaining the sample to matching and selecting the right paint, every step guarantees which you hold stain consistency in your property. Even if you can’t extract a bodily pattern, alternatives exist that will help you find a close in shape. Remember, the purpose is not simply to in shape the stain however also to make certain the new paint complements your own home’s aesthetic and useful needs. By following those steps, you could effortlessly get a painted version out of your wall and achieve a super stain fit. Happy painting!